
Purpose: to write IF and IF AND statements in Excel Power Query and Power BI, including nested IFs.
Links to topics on this page
- Power Query IF statement syntax (if … then … else)
- Create an IF ELSE statement in Power Query
- Power Query IF ELSE example
- Create an IF AND … ELSE statement in Power Query
- Related topics
Power Query IF statement syntax
In Power Query an IF statement has the syntax if ... then ... else:
= if [condition] then [do this] else [do that]
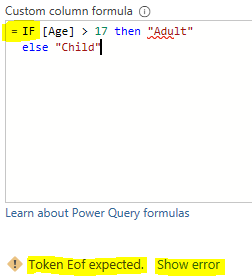
Writing IF statements in Power Query is very similar to creating them in any other program, but one of the key things to remember is that the commands need to be in lower case, i.e.:
- CORRECT: ‘if … then … else’,
- INCORRECT: ‘IF … THEN … ELSE’.
If you’re getting an error, then it’s worth checking that first.
Another feature of IF statements in Power Query is that you don’t need round brackets ‘( )’ around the function commands; you do, however, need to have square brackets ‘[ ]’ around any column (variable) names.
If this is the first time you’ve worked in Power Query, see our post on how to connect to data and create a data query in Excel: ![]() Get started with Power Query – connect to data and add an Index
Get started with Power Query – connect to data and add an Index
Create an IF statement in Power Query
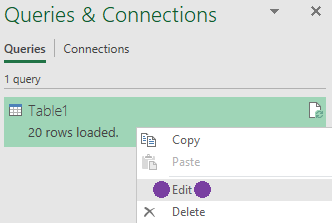
- Either select an existing data query:
- select ‘
Show Queries‘, or ‘Queries & connections‘ from the Data tab of the ribbon, - select a query, and
- right-click and select ‘
Edit‘;
- select ‘
- Or create a new data query from a data range or Excel table:
- highlight the range of cells, or click anywhere in the Excel table,
- select ‘
Get Data | From Other Sources‘ on the Data tab (or the equivalent in your version of Excel), and - select ‘
From Table/Range‘.
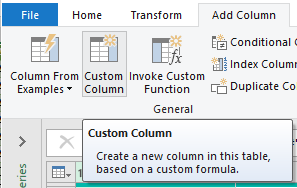
- ADD THE IF STATEMENT: On the ‘
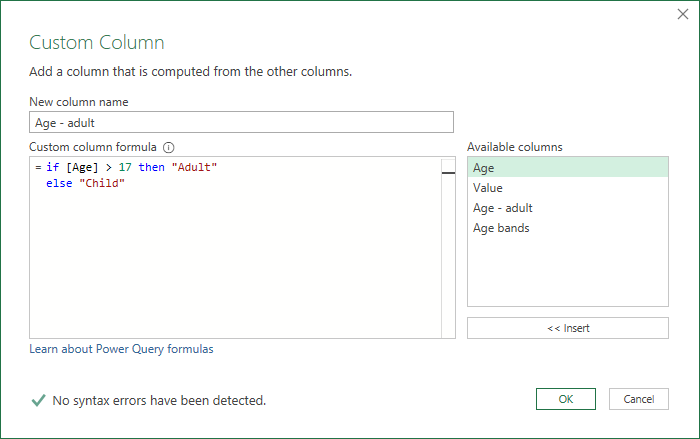
Add Column‘ tab of the Power Query Editor window, click on the ‘Custom Column‘ icon. - In the Custom Column editor window, give your new column a name, and enter your ‘if…then…else’ statement into the Custom column formula window. You’ve got your available columns in a pane on the right which you can double-click to add the item to your formula.
On the next page we give an example of a Power Query IF ELSE statement, and how to create a set of nested IF AND … ELSE statements in Power Query >>