
How to get year and month from date in Power Query
Links to topics on this page
- Open data table in power query
- SYNTAX: get YEAR from date
- SYNTAX: get MONTH from date
- Table result with new year and month columns
- Power Query CONVERT datetime to date format
- Use the ADVANCED EDITOR to create the new columns
Steps to get year and month from date in power query
- Create a new power query from your data table
- Add custom columns and enter the formulas for getting year and month
- Optional: you can enter the steps directly into the advanced editor (shown at the end of this post).
Open your data table in Power Query
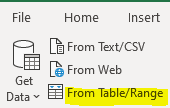
Click in your data table, and from the Data tab in the ribbon, select From Table/Range. Your data needs to be set up as an Excel table, and you need to have a column with dates or datetimes in. See our article here on the benefits of using structured tables in Excel: Create, format, resize and rename Excel TABLES.
Add custom column for year from date
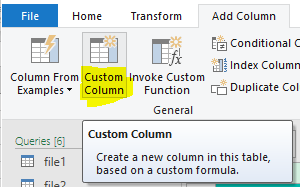
From the Add Column tab, select the Custom Column button.
- Then enter the formula to extract the year from the date.
Date.Year()is a function so is followed by round brackets(), and the column name is wrapped in square brackets [].- Date is the name for our date column.
- Rename your column in the
New column namebox.
SYNTAX
= Date.Year([Date])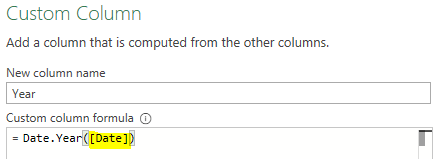
Add custom column for month from date – return integer or text
Add another custom column as above, and enter the formula to get the month from the date.
- When you type Date in the formula box, you’ll see a list of formulas to choose from.
Date.Month()returns the month as an INTEGERDate.MonthName()returns the month as TEXT e.g. January.
SYNTAX
= Date.Month([Date])
OR
= Date.MonthName([Date])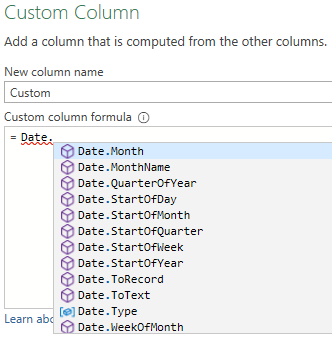
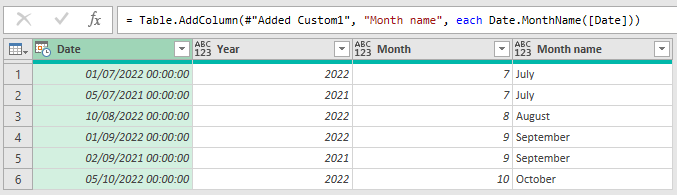
Table showing our new custom columns for year, month as integer, and month as text
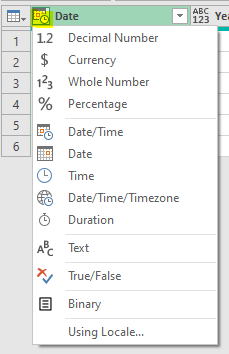
Power Query convert datetime to date
You can easily convert between different date formats in Power query. In the header row of your table, click on the data type icon in the top left of the column header, and make a selection from the dropdown list.
Power Query get year and month from date in Advanced Editor
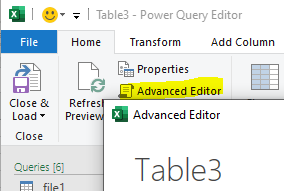
These are the steps to enter into the power query advanced editor to get year and month from date. Open the Advanced editor from the Home tab in the Power Query window.
In our example below, the table containing our data is named Table3.
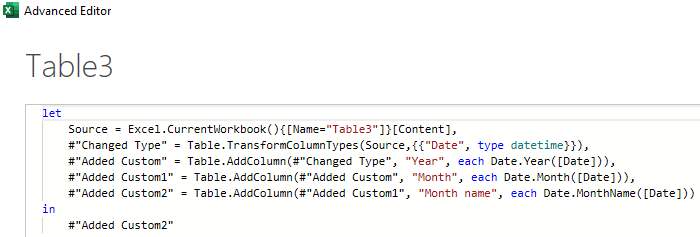
let
    Source = Excel.CurrentWorkbook(){[Name="Table3"]}[Content],
    #"Changed Type" = Table.TransformColumnTypes(Source,{{"Date", type datetime}}),
    #"Added Custom" = Table.AddColumn(#"Changed Type", "Year", each Date.Year([Date])),
    #"Added Custom1" = Table.AddColumn(#"Added Custom", "Month", each Date.Month([Date])),
    #"Added Custom2" = Table.AddColumn(#"Added Custom1", "Month name", each Date.MonthName([Date]))
in
    #"Added Custom2"
Microsoft article on year from date in Power Query: https://learn.microsoft.com/en-us/powerquery-m/date-year.