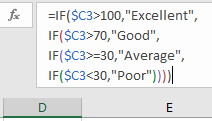
Purpose: nested IFs in Excel to test for multiple conditions

Links to topics on this page
- Single IF statement syntax and example
- Nested IFs in Excel
- Worked example: nested IFs with numeric values
- Key notes about IF statements
- Important rules and tips about nested IFs in Excel
- Related links and topics
Single IF statement syntax in Excel
An IF statement is a really powerful tool to test for a condition then specify different outcomes.
IF statements are based on a TRUE/FALSE test – if a condition is true then one specified action results; if the condition is false (which is the only other outcome in a binary TRUE/FALSE logical test), a second specified action will result.
Therefore, you can only compile a valid IF statement if the condition you are testing for has TRUE or FALSE outcomes.
The basic syntax of a single IF statement has three elements:
- state a condition
- (which) if true, will then result in one action
- (else) if false will then result in another action.
IF condition X is true then do A else do B
In Excel the syntax is simplified, so that the three elements are entered within brackets after ‘IF’, separated by commas; the ‘else’ and ‘then’ statements are not written out in full, they are assumed by the syntax of the function.
= IF (condition_is_true, do_this, else_do_that)
 = IF (A2 > 100, (A2 + B2), (B2 - A2))
Excel’s technical syntax definition of an IF statement
= IF( logical_test, value_if_true, [value_if_false] )
Excel IF statement example
= IF(A2 > 100, (A2+B2), (B2 – A2))

Syntax description: in the example above, the condition is to test if the value in cell A2 is greater than 100. If the value IS greater than 100, the action to sum the values in A2 and B2 will be carried out; if the value is not greater than 100, then the value in A2 will be subtracted from the value in B2.
[value_if_false] element is optional
The [value_if_false] / ‘else_do_that’ element is optional, you don’t have to specify to Excel what the outcome is if the condition is false. The default value returned will be the logical value ‘FALSE’.

Nested IFs in Excel
The power of the IF statement structure is that you can daisy-chain (nest) IF tests together, so that, after checking for the first true condition, you can then test for another one, and so on …
=IF(A2 = "Parrot", "Bird", IF(A2 = "Donkey", "Animal", "Other" ))
The above example
- tests if cell A2 contains the value ‘Parrot’, and returns ‘Bird’ if True;
- if false, Excel moves to the next test to see if the value in cell A2 is equal to ‘Donkey’ …
- … which if true, returns ‘Animal’;
- if A2 contains neither values (parrot or donkey), the value returned is ‘Other’. This is the ‘else’ part of the function – if none of the preceding conditions are true, then return this value;
- the final ‘catch-all’ action is included within the final IF statement brackets; this is the element which is optional – if not included, and the preceding conditions are False, the value ‘FALSE’ will be returned by default;
- note that the number of closing brackets ‘)’ at the end of the formula equates to the number of IF statements (two in our example).
On the next page we show an example of nested IFs using numeric values >>
